Paint Glue Over Maples Leaves, 24 Hours Later: This Is Gorgeous!
Here's how you can create something truly special for your Autumn table this year.

Paint Glue Over Maples Leaves, 24 Hours Later: This Is Gorgeous!
Here's how you can create something truly special for your Autumn table this year.
Autumn is the time to stay indoors and begin working on some holiday projects. This warm and cozy DIY basket is simple, easy, and it looks amazing when finished. You'll have the brightest, most original centerpiece in the neighborhood.
Use fake maple leaves to create a bowl that can be used year after year; or use real maple leaves, which will not be as durable, but will look more authentic.
NOTE: You are not limited to leaves. Try some holiday decorations for a Christmas or Winter flavored bowl!
Here is what you will need to create this lovely Fall bowl for display.
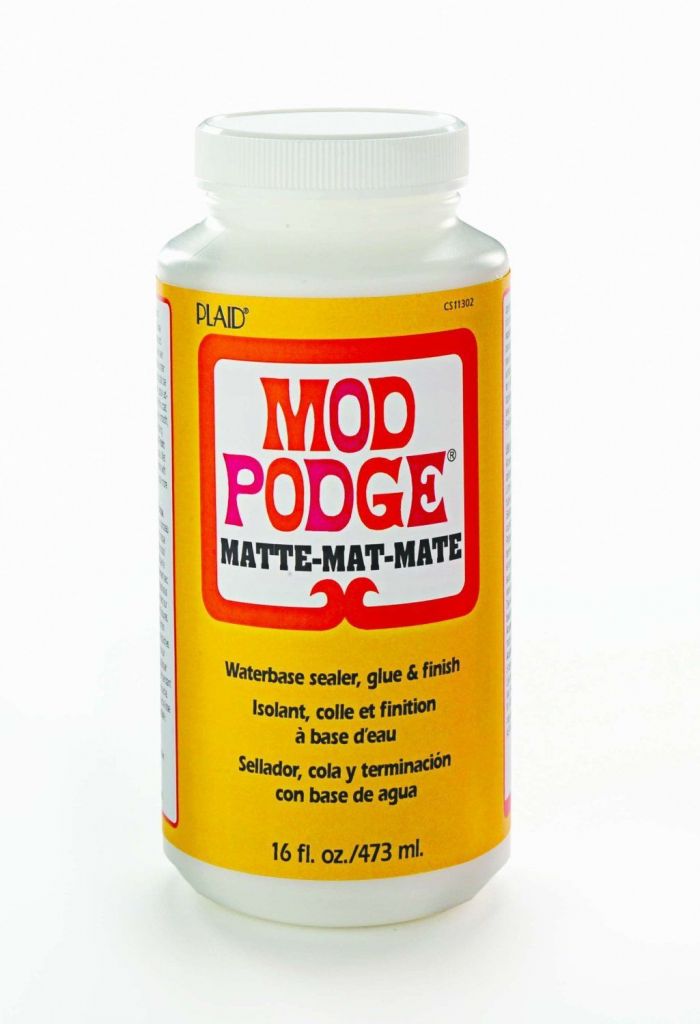
1 Bottle of Mod Podge (available at craft and department stores)
1 Paint Brush
Saran or Any Plastic Wrap
A Large Bowl
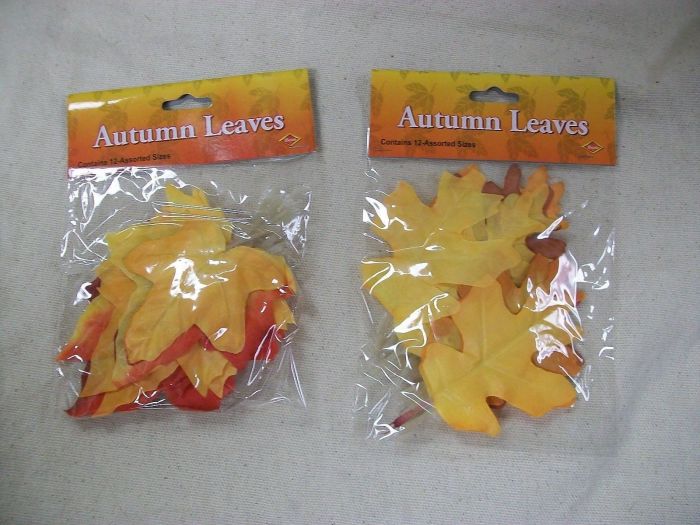
Maple Leaves
Real maple leaves will make your basket look awesome and very authentic, but to keep using your creation every year, just pick up a few bags of fake leaves from the craft supply store. They may even be available at the Dollar Store.
When you have your supplies ready, put the bowl together.

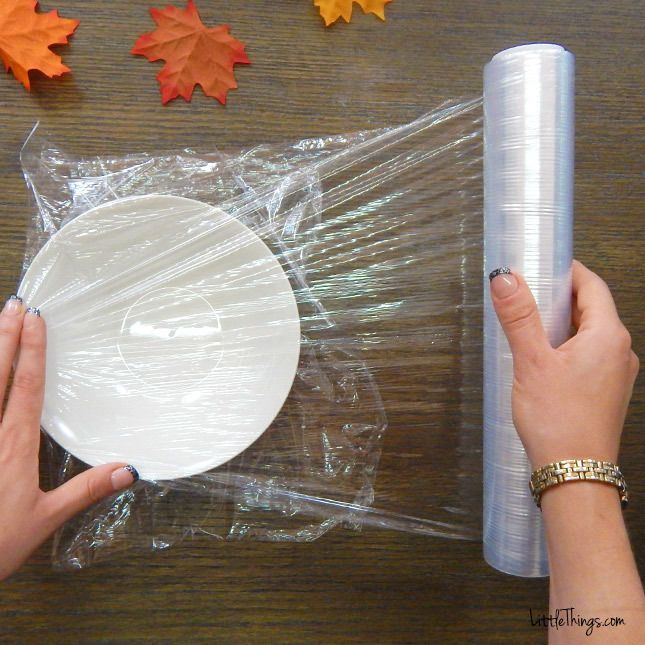
Prep the bowl that you're using as the mold by covering it with plastic wrap. (Be sure you cover every inch of the bowl, as this will help prevent the leaves or excess glue from sticking to it.)
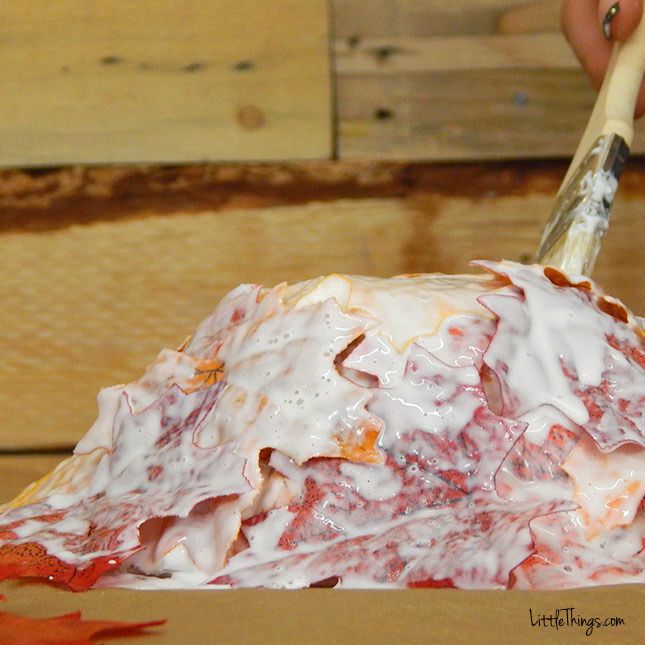
Turn the plastic-wrapped bowl upside down and apply Mod Podge directly to the plastic wrap. Place the leaves (one at a time) onto the glue, and add another layer of Mod Podge on top to make each leaf stick. Be sure to use a LOT of the sticky Mod Podge glue.
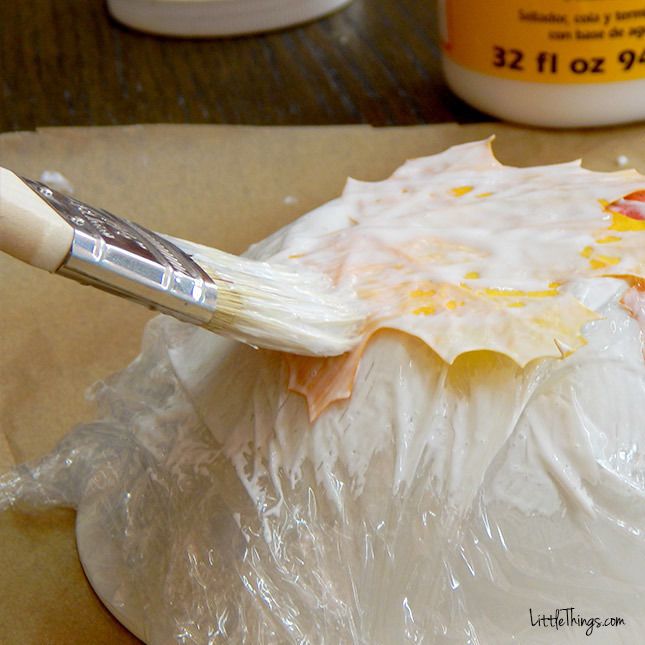
Use A LOT of glue to make sure it fully adheres to the leaves. (And don't worry about using too much Mod Podge, as it dries clear and cleans up easily with soap and water.) Give the whole bowl a full covering of scattered leaves and the glue.
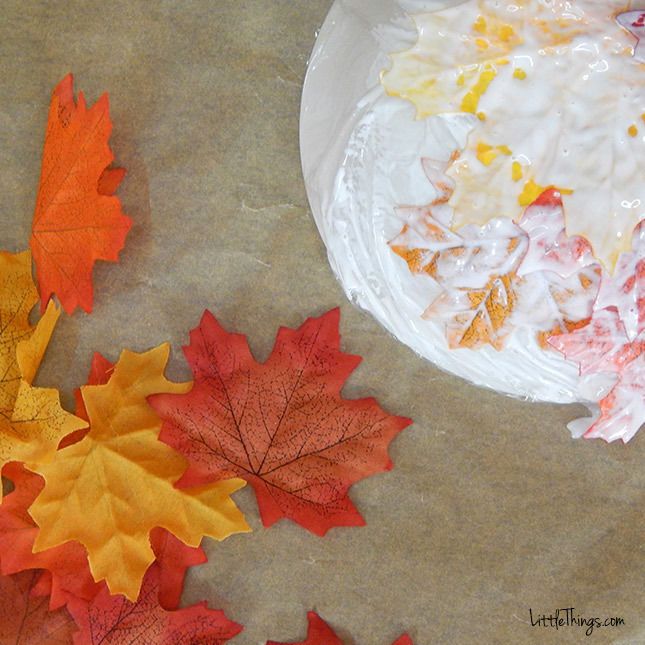
Continue "painting" on the leaves making sure there are no gaps. Get creative and use a variety of colors and sizes until the entire bowl is covered.
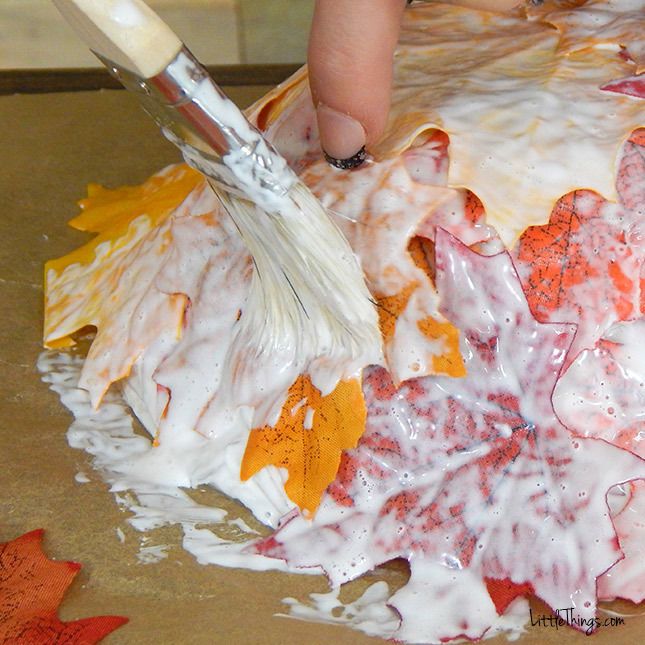
After about 25 minutes, and the original glue (Mod Podge) begins drying, add another coat of Mod Podge over all the leaves, and allow it to dry overnight. A good 24 hours is best.
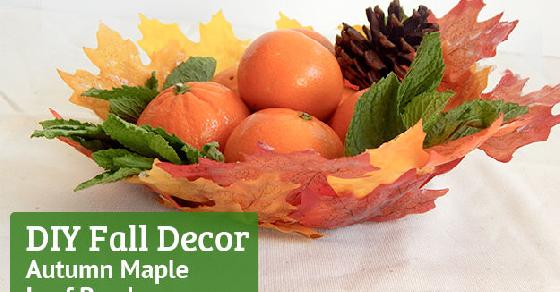
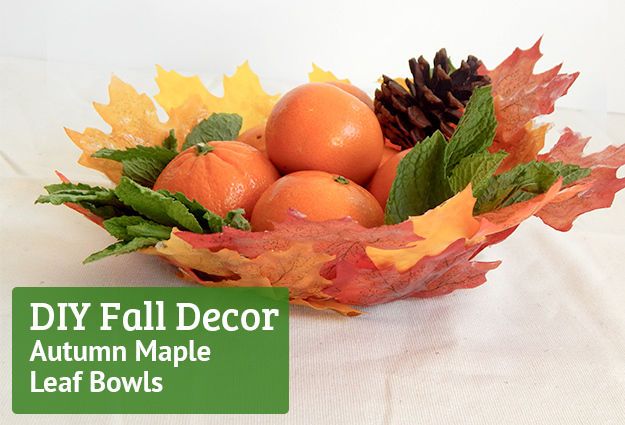
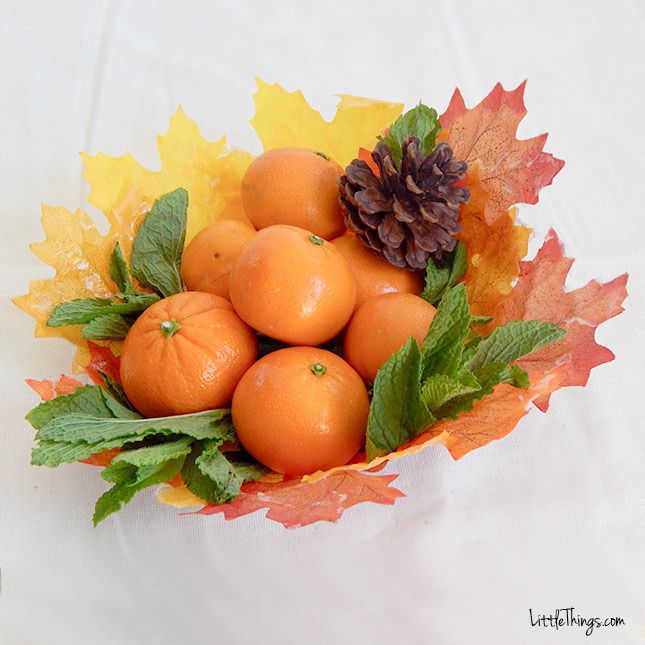
The next day, carefully separate the leaves from the plastic wrap and carefully cut off any excess glue that remains. The leaves should be hard and completely durable after drying. Your next step is to add your Autumn decoration to top off your beautiful new bowl.
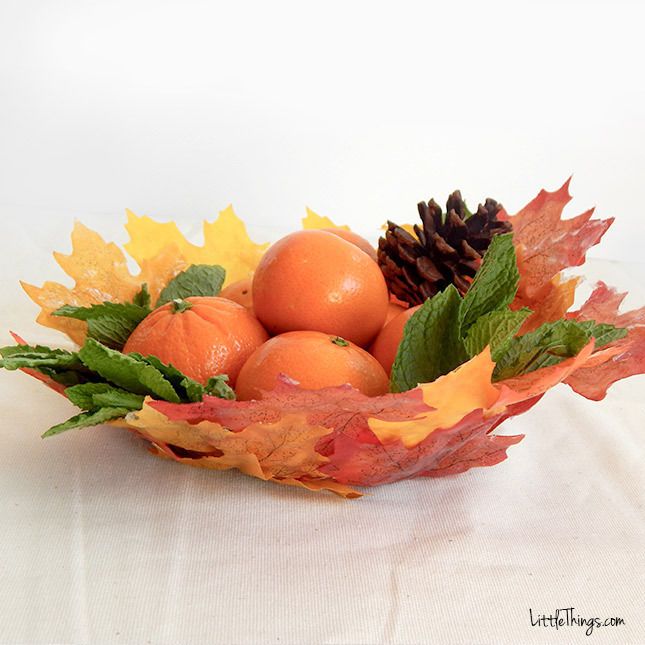
fill the beautiful decoration with goodies that will transform your home for fall. This beautiful fall bowl should reflect the coziness and comfort that comes with the holidays, so I personally love filling it with tangerines, fresh mint, and scented pine cones. As winter eases in, add some cinnamon scented pine cones and sprigs of berries for that added cozy feel.
The possibilities are endless!
Not only is this an easy craft to make, the colorful fall foliage bowl will brighten your room and be a beautiful conversation piece when you have family and friends in your home. Don't be afraid to experiment and try something new to give your bowl an extra piece of your own personality. Try different items in place of maple leaves for different seasons.
Enjoy!