These beautiful and fun Christmas trees will brighten your home this Holiday season, and guess what, all you need are just a few simple items for each one! How easy is that?

Get Creative! These Easy Beautiful Miniature Christmas Trees Will Bring Out Your Inner Martha Stewart!
By
Editorial Staff in
Facts
On 1st December 2015
advertisement
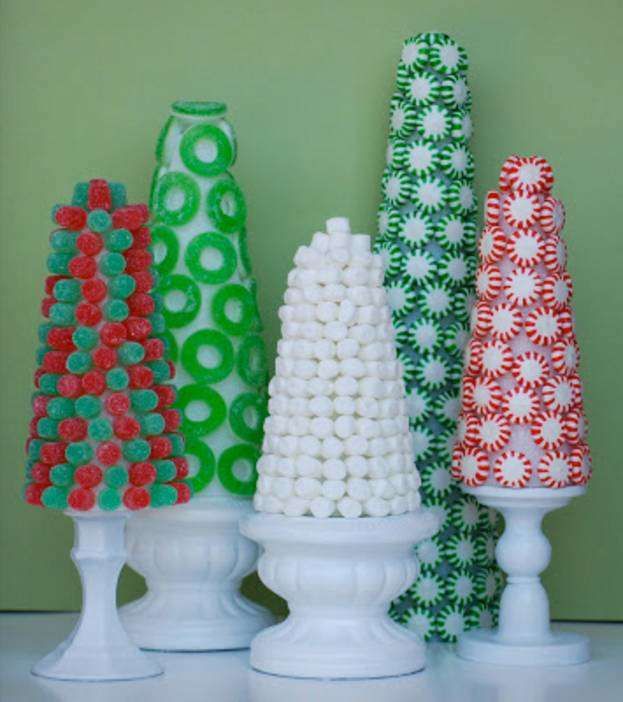
#1 The Candy Tree
Not only is it yummy, but just the sight conjures up Holiday memories. All you need to create this tree is a styrofoam cone (we'll use these in almost every design, so stock up on the, they are very inexpensive and come in a range of sizes), candy, hot glue, and a pedestal if desired.
Just glue any colorful candy or treat to the cone, place on a candle holder or decorative pedestal, and it's finished!
#2 Golden Fringe Tree
Simple to create, and beautiful to look at. Again, get any size styrofoam cone, then hot glue strands of gold or colorful fringe that you can purchase from any fabric store. The look is charming.

advertisement
#3 Beaded Yarn Tree
Following the same rule.. get a styrofoam cone. Take a ball of green, or colorful yarn, and begin wrapping from the top down. Every 4-5 inches run the yarn through a bead or tiny bulb and keep filling in your tree until you reach the bottom. Cut the end off the yarn and glue the hanging piece to the bottom of your tree. DONE!

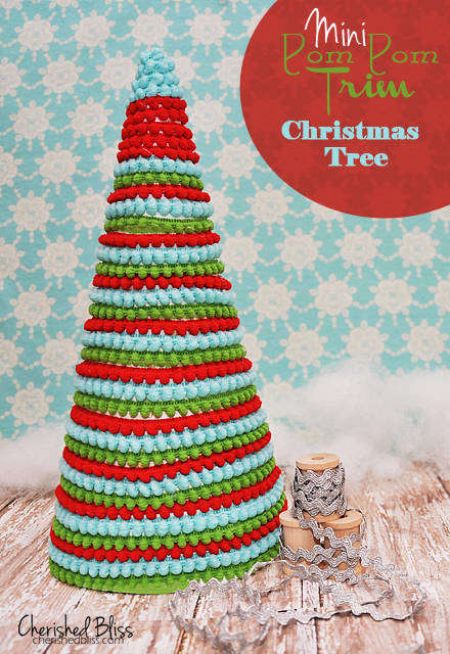
#4 Pom-Pom Trim Christmas Tree
You can buy tiny little pom poms or get them on rolls. Rolls work best. Just wrap the cone with one line, cut, glue, and move down further until your tree is totally covered. Experiment with colors for an amazing look!
advertisement
#5 Yarn Tree
This one is my favorite. And it's very easy to create. Use some thin yarn you may have left over from a project and squirt it as you move from the top to the bottom with plain old glue. Don't fill the entire cone, leave empty spaces, by crisscrossing back and forth as you go. Let it dry for about 8 hours then slide it off the styrofoam cone. It should slide off easily as that glue does not adhere to the foam very well. You can leave it as it is or add tiny decorations.

advertisement
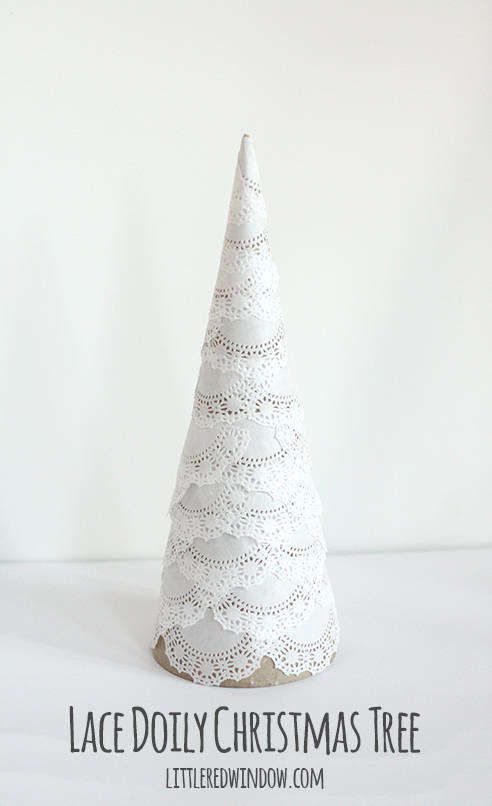
#6 Doily Tree
It's as easy as pie, but very attractive for that mantle or end table. You can even skip the cone on this project and use a piece of cardboard glued together in a cone/tree shape. Then take your packet of paper doilies and glue them over top of one another until the cone is covered. On this tree, start at the bottom and work your way up. Isn't that simple?
advertisement
#7 Hodge Podge tree
Tale your styrofoam cone, search your junk drawer for any little bobbles or beads, broken jewelry, pins, etc... Just glue them all over the cone! When dried, take to a ventilated area and spray paint the entire tree with either gold or silver paint. ADORABLE centerpiece!

advertisement
#8 Coil Wire Tree
The easiest tree on the list to create. You only need that styrofoam cone and some mid weight copper colored or silver wire. Starting from the top of the cone, begin wrapping it in a downward spiral until you get to the bottom. Snip off the excess, remove wire from the cone and WOW! You've got a little tree! make several in various sizes and colors for a great table arrangement.

advertisement
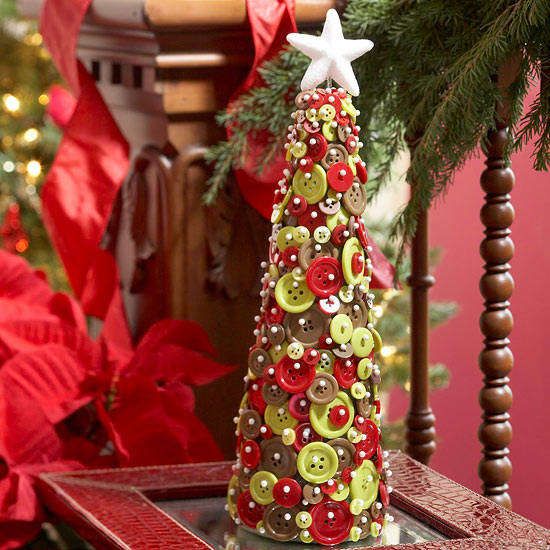
#9 Old Button Tree
If you have a bag full of old buttons then this tree can be created with ease. All you do it take beaded pins and stick them through the button holes and into the cone. To overlap, just line up the holes from the top, smaller button with the lower, larger button and pin that one too. The whole thing takes less than 30 minutes to create.
advertisement
#10 Fancy Fur Or Felt tree
If you're feeling fancy, try any one of the pearl, silk, feather, or felt trees. They always look more elegant placed on a glass pedestal or candle holder. But these are very easy to create using the same simple instructions as previous designs. Just hot glue your feathers or tiny felt "slices" to the cone for a fancy look. You may use strands of beads as well, or even just bunch up material in a small wad and glue it together before gluing it on the tree cone. Experiment with various materials from the fabric store. They always have a bargain bin of loose pieces and leftover fabrics.

advertisement
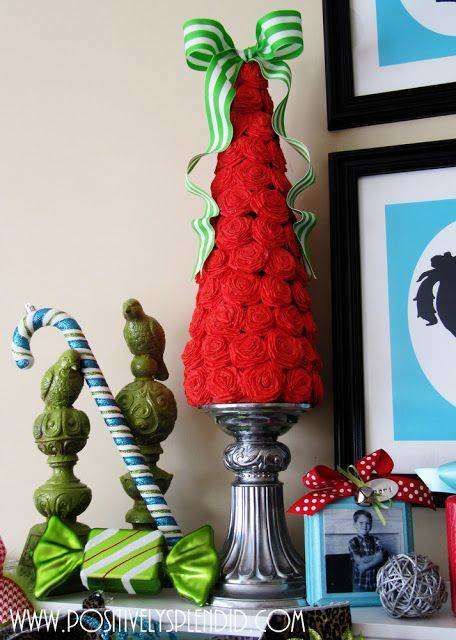
#11 Flower Tree
This beautiful rose tree can be made with ease. You can use any flowers, such as poinsettias or anything that catches your eye. Again, same procedure... just glue, decorate with a bow, and you're done. Also, remember that pedestal for an added look of elegance.
advertisement
#12 Tinsel Tree
Festive and sparkly, this one is so simple to make that it might be done in less than 15 minutes. Using thing rope tinsel, simply spread hot glue all over your cone, then quickly, starting from the top, wind the tinsel downward until the whole thing is covered. It should be dry already and you may even need to add more hot glue before you reach the bottom, but it's as cute and wintery as you can get.

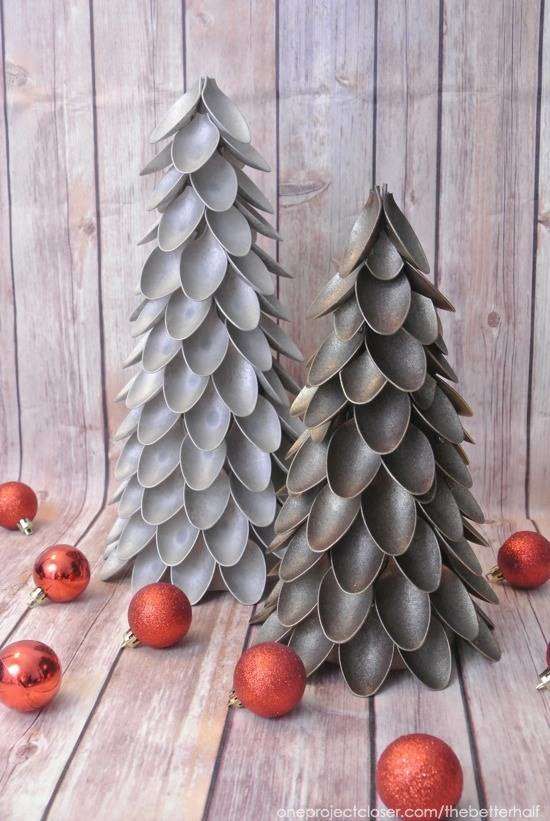
#13 Plastic Spoon Tree
Get a box of plastic spoons, or save them up from fast food joints through the year. Snip of the spoon part, and starting from the BOTTOM of your cone, begin gluing the spoons to the tree in a circular pattern. By the time you reach the top you'll have this amazing little tree. You can leave it the color of the spoon (they sell them now in greens, red, whites, and assorted colors) or spray paint your finished creation. This is one of the best looking desings to try your hand at.
advertisement
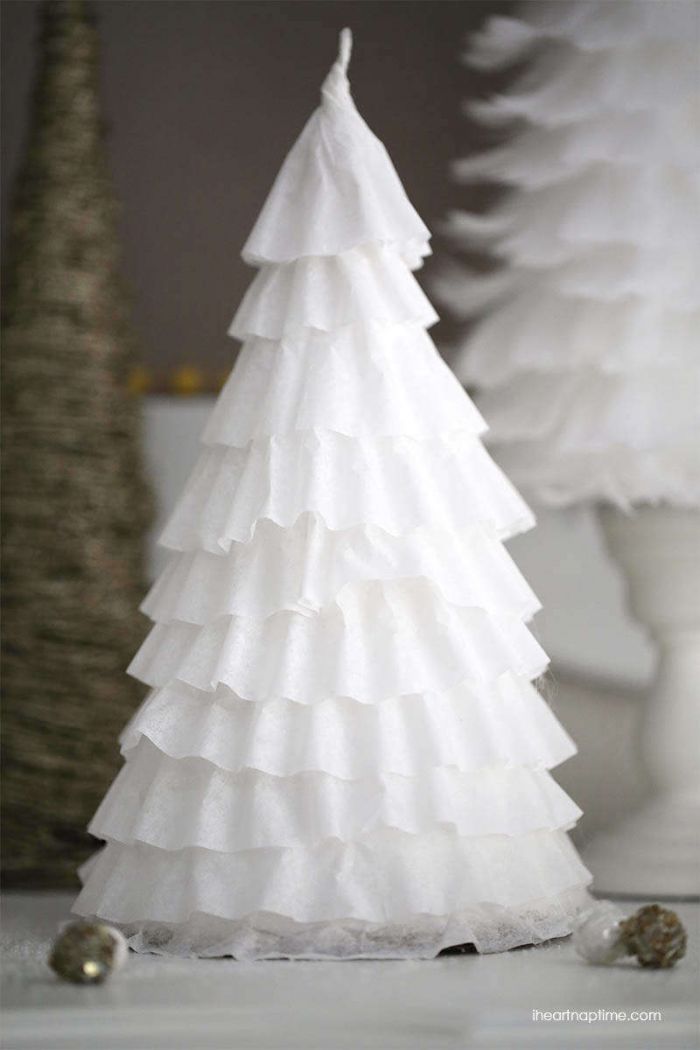
#14 Coffee Filter Tree
Yep, that box of filters from the dollar store can be sued just like that material to create a cute little snowy Christmas tree. Don't use a large cone, a smaller one works best for this project. Start at the bottom, layering the filters slightly over top of one another until you reach the point. Twist the end into a point, use regular paper glue to hold the tip up, and you're done! You can hang little balls or decoration from the tree using either glue or the small ornament hangers. For an added touch of creativity, gently spray paint portions of the tree green so it looks like the snow is just covering the branches.