
When you see what this guy did with second-hand tables, you will be amazed. Get ready for an easy project that will add to your home decor and show off your collection of just about anything.

Man Lines Up Pennies On A Table. Hours Later? This Is A Totally Awesome DIY Idea
By
Editorial Staff in
Facts
On 29th April 2016
advertisement
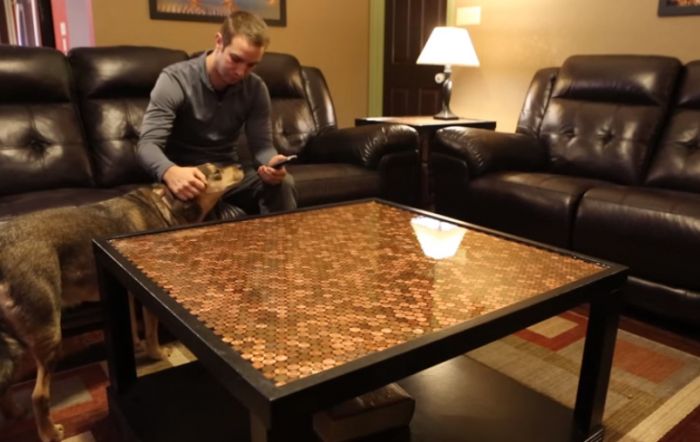
#1 Unique Tables And Collection Display
He made his own unique tables using a few simple items and pennies! Once finished, they are impressive looking and totally one of a kind. The tables can be made using the pennies, as we will show, or corks, bottle caps, other coins, magazines, old postcards, comic books, or anything of your choosing.
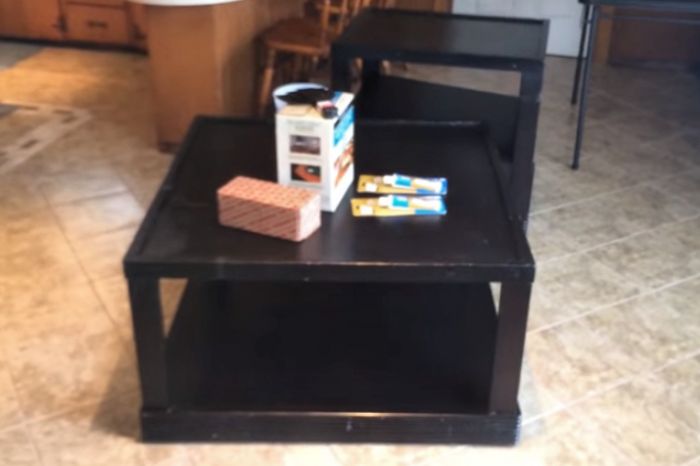
#2 Any Beveled Tables Work Well
First, he went looking for old tables to use for his project. He found this set on Craigslist, but you can search at garage sales or thrift shops for tables that are suitable to your taste. The beveled edged tables work best, as the indentation helps hold the decorative items in place and keep the resin from dripping.
advertisement
#3 What You'll Need
You will need the following items to create your new tables:
Glue
Painters tape
Glaze coating
Hardener
A scraper
A bucket and mixing stick
And of course, lots of pennies (or bottle caps, etc..)
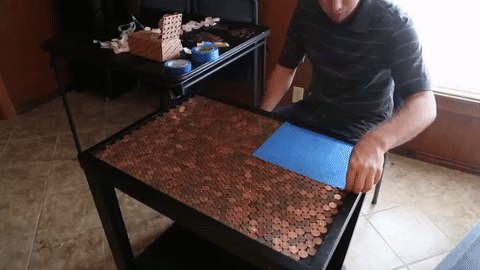
#4 Prepare Your Design And Start Gluing
Lay your pennies out onto the table top in the pattern you desire. Then, using painter's tape, mask off sections in blocks. The tape will retain the pattern while the section is flipped over so that the glue can be applied to the bottom of each penny. Once you have applied the glue, flip the section back over into place. After an hour of drying, the pennies will be secure, so you can remove the tape from the top.
advertisement
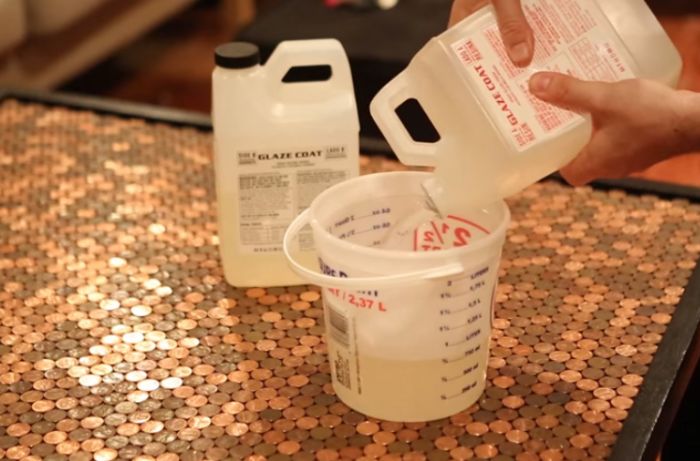
#5 Mix The Resin And Glaze Coating
Next, you will mix the resin, which will consist of one-half hardener and one-half glaze coating. Make sure you stir this well and have no bubbles in the mix.
advertisement
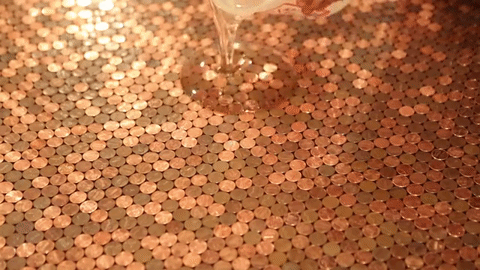
#6 Spread The Resin Over The Top
Immediately after mixing pour the resin all at once into the middle of the table and let it spread out on it's own for about a minute. Use the scraper to spread out the remaining coating, making sure to fill in all the nooks and crannies and get rid of any air pockets.
advertisement
#7 Ready To Display In Less Than 36 Hours
Let the table sit for about 36 hours and it's ready to use! Of course, every table is unique because of the structure itself and the items you decorate it with, so this is a project you can truly make your own.

advertisement
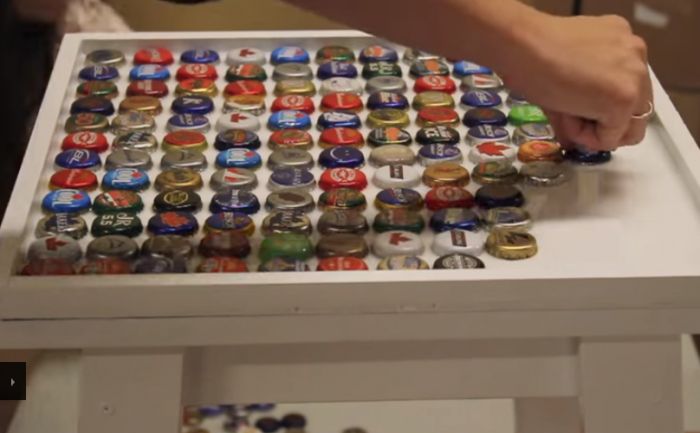
#8 Bottle Caps
Here is an example of the same technique using old bottle caps to decorate the table top with. Show off your taste in beverages by making this little table for your den or man cave.
advertisement