By drilling holes in the sides of a wooden box she creates a gorgeous masterpiece.
She Drilled 19 Holes In A Wooden Box, 3 Months Later It's Beautiful
By
Editorial Staff in
Facts
On 11th April 2016
advertisement
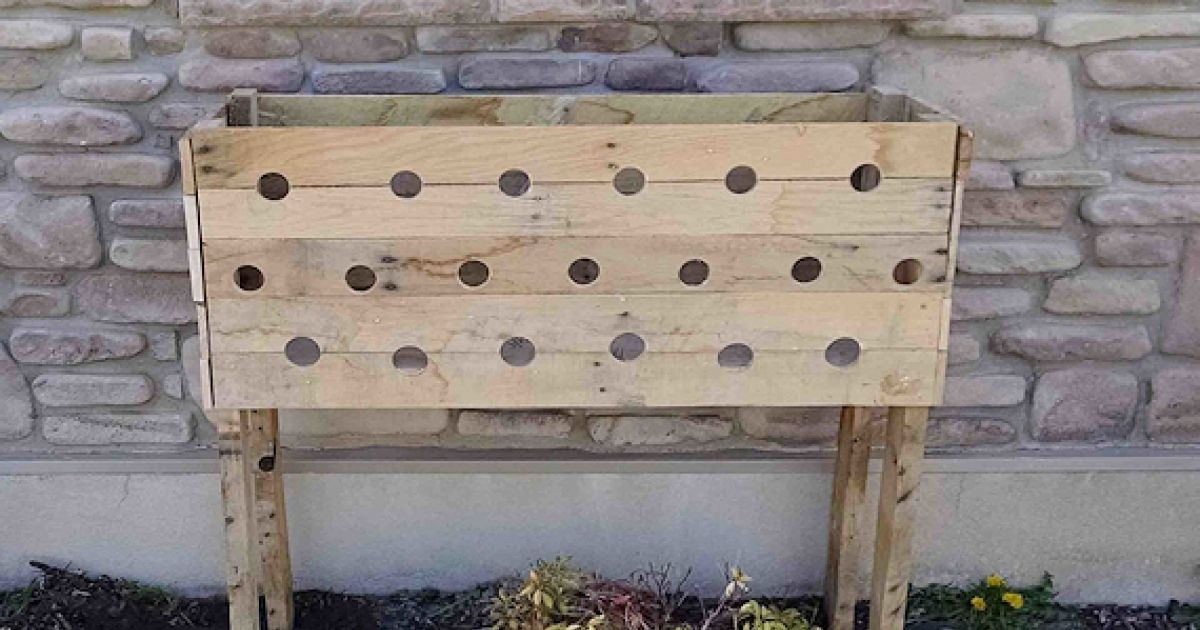
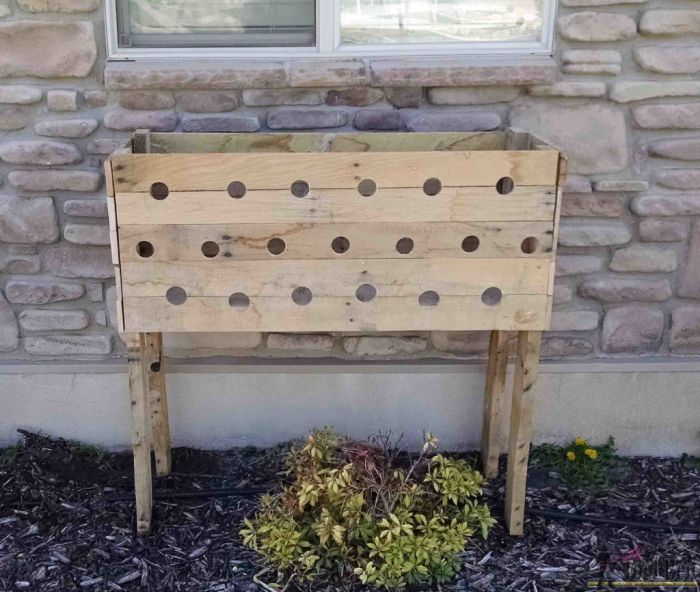
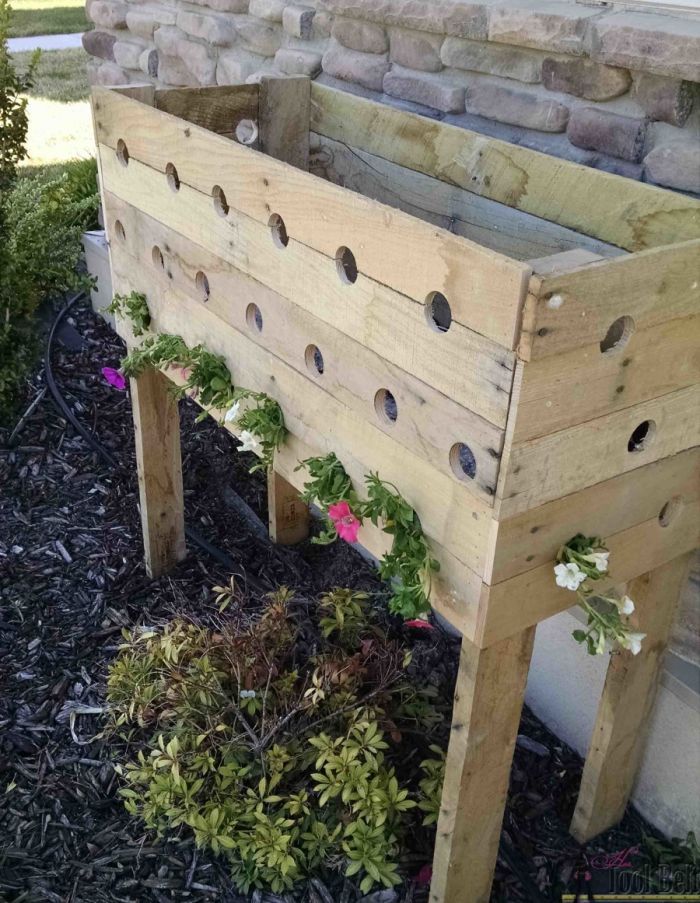
#1 A Simple Box
DIY home expert Amy decided to share her latest home project, which turned a simple box into something you wouldn't imagine! "I used a 2″ hole saw to drill holes for the petunias," Amy wrote "Spacing the holes about every 6″ or so." She began the project in late July.
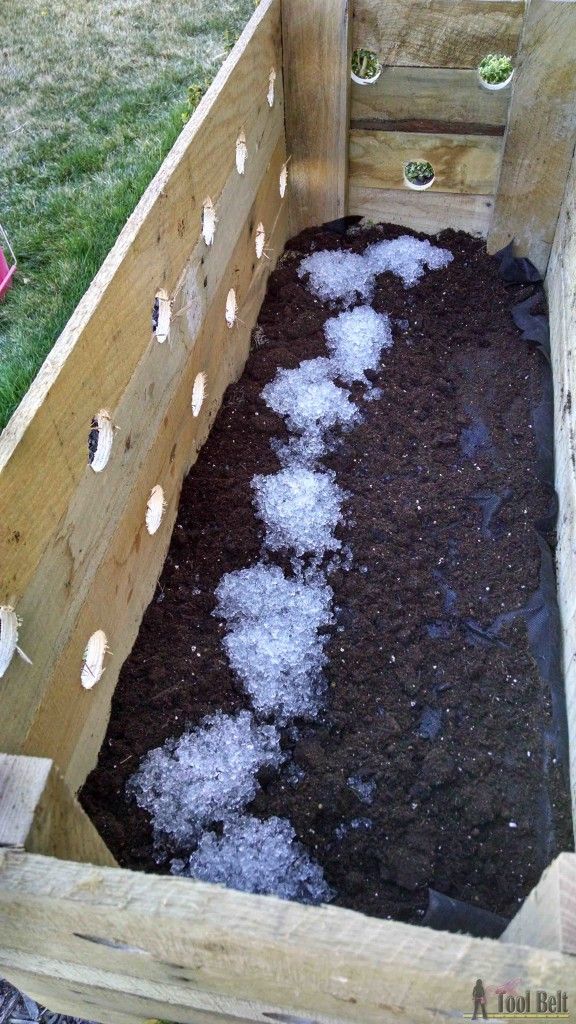
#2 Good Base
"You need good potting mix and you need to add moist soil to help retain water. I put a layer of weed guard down on the bottom, because I had a few holes." She had a rather large wooden box, but this can be done just as well with any sized structure you are able to put holes into.
advertisement
#3 Wave Petunias
Add the first row of flowers, then cover with soil. "These flowers are Wave petunias that I got at Costco, you can also rotate the flowers between regular, cascade and wave petunias."
#4 Packing Peanuts
Place packing peanuts in the far back of your box for some lift to the arrangement, then add the second and third row of flowers, watering again and adding more packing peanuts to the backside. Add the third row of flowers, fill with dirt and plant flowers on the very top.

advertisement
#5 Water Every Day
"You need to water the flowers every day, the holes let the dirt get dry. I usually water until the water leaks from the lower holes. I also fertilize 1/week," Amy explains.
advertisement
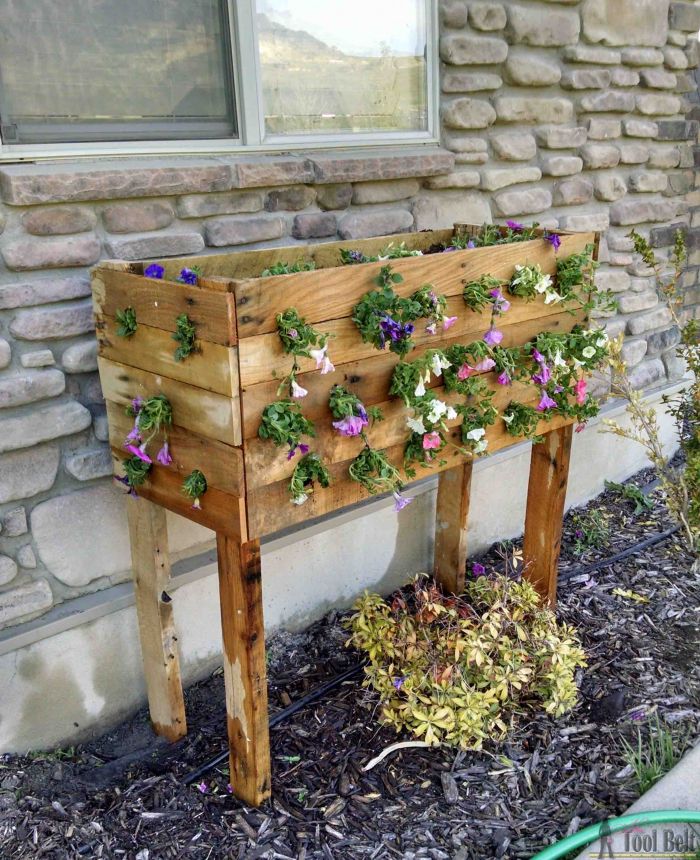
#6 Getting There
In just a few months the flowers began to flourish, adding a beautiful fresh mix of color to her garden! "It was the really hot part of the summer and the foliage was very green and pretty, but not many flowers. I realized I needed to spray for bugs and the flowers came back."
advertisement
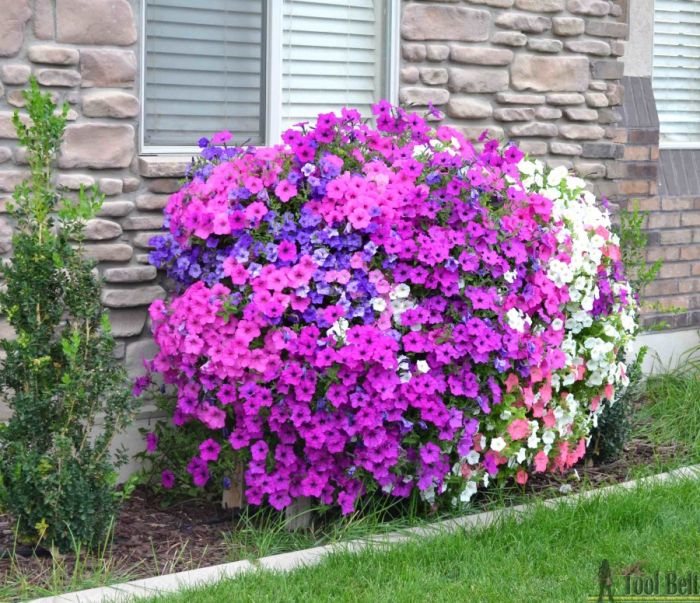
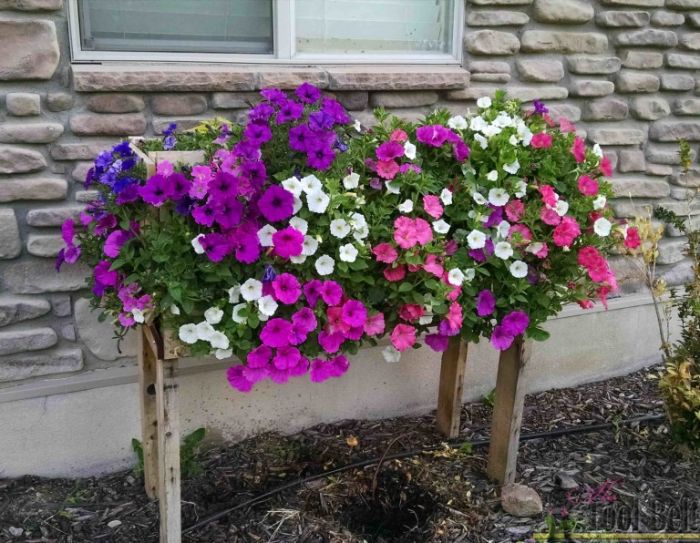
#7 Amazing!
"Sprayed it for bugs one last time, and one week later it looked amazing! Here is the result of the flower box in late September, gorgeous!" Amy said that this is the best results for a flower garden she has ever had, and will try strawberry plants next year.