When trying to keep the cost of the holidays, homemade is the way to go.
Really Cool DIY Gifts In A Jar Just In Time For Christmas
By
Editorial Staff in
Holidays
On 21st November 2016
advertisement
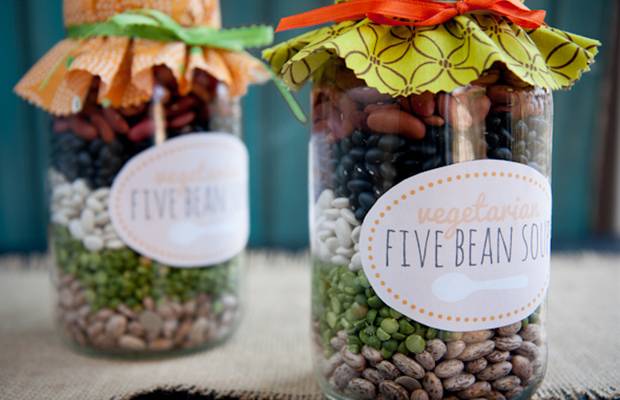
Five Bean Soup
This is a great one because it is so easy to make. Only takes about 10 minutes to put together once all the ingredients are gathered. Once all the ingredients are in the jar just cover it with some pretty Christmas material and ribbon. You can make and print your own labels with directions or follow the link below. This makes a nice gift whether it be a planned gift or a last minute one. A perfect gift for a college student who doesn't live at home. And being that every ingredient is already in the jar, there is no measuring, just simply preparing the beans to go into the pot.
Here is a list of what you will need.
ITEMS NEEDED TO PUT IT ALL TOGETHER:
4 clear quart Mason jars plus lids and rings
Parchment paper OR small zip-top baggies
Tape or stickers
Labels
Fabric and ribbon to cover top
BEANS:
1 pound pinto beans
1 pound split green peas (or green lentils)
1 pound great northern beans
1 pound black beans
1 pound kidney beans
SEASONINGS:
1 tablespoon black pepper
1 tablespoon paprika
1 tablespoon dry mustard
2 tablespoons dehydrated onions (found in the spice aisle)
2 tablespoons sea salt
2 tablespoons garlic powder
2 tablespoons dried oregano
1 teaspoon dried rosemary
8 bay leaves
4 vegetable bouillon cubes
Start with layering the beans in the jar:
In each of the four Mason jars, layer 2/3 cup of pinto beansshaking - for a nice even layer, gently shake the jar to level them out. Then repeat with 2/3 cup of green peas and so on ending with the kidney beans. Set jars aside while you prepare the seasoning packet.
How to make the seasoning packet:
In a small bowl, combine all remaining spices except bay leaves and bouillon cubes.
On a 10″ x 10″ piece of parchment paper, spoon 3 tablespoons of the spice mixture in the middle. Place two bay leaves and one bouillon cube on top. Fold parchment around spices to make a small spice packet. Seal with tape or stickers. Repeat three more times to create four total packets. Squish the packets into the top space of each of the four bean jars. You can also package the spices into plastic zip-top baggies if you prefer.
Place lids on jars, cover in fabric and ribbon and label as desired.
Directions for cooking: (These should be printed on one of the labels)
Carefully remove spice packet and set aside.
Rinse beans and place in a large stock pot.
Cover beans with water with an inch of water above them.
Cook on high heat, once at a boil let cook for one minute.
Then remove beans from the heat and let soak for one hour, covered.
Rinse and drain beans and return them to the pot.
Add in the spice packet then add 1 14oz can of diced tomatoes, and 6 cups of water.
Cook on high heat until it comes to a boil, once at a boil, reduce heat and simmer for 1 1/2 - 2 hours.
Labels with directions can be downloaded at http://wholefully.com/locker/handmadeholiday/fivebean-labels.pdf - You can thank by Cassie Johnston for the instructions and labels for this fantastic gift!
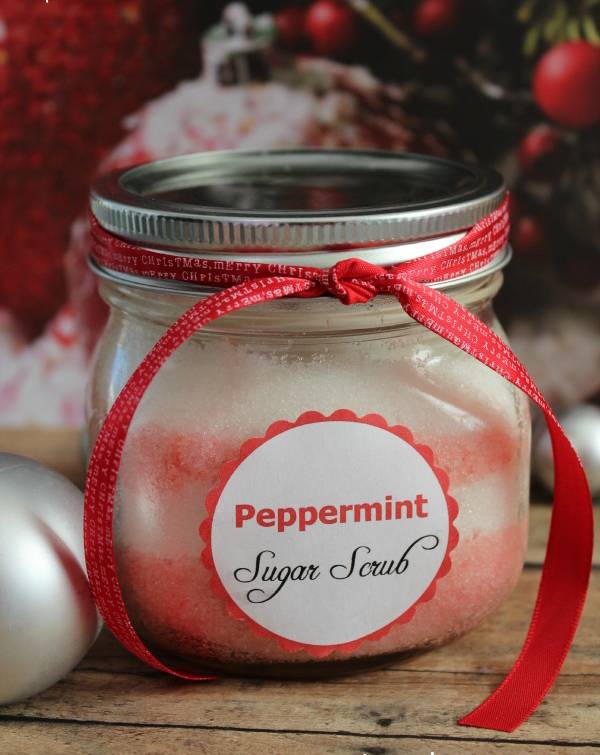
Peppermint Sugar Scrub
This would be great to use in a bath on Christmas Eve! Imagine going to bed smelling all pepperminty! You will definitely be dreaming of candy canes and sugar plum fairies!
A jar of coconut oil will make at least 10 jars! And you don't have to buy the expensive brand mason jars.....many of the $1 stores have them. The nice think about this is you can make several different scents but just changing the Essential Oil and the food coloring.
Although I don't know many who wouldn't like a gift like this, this would make a really nice gift for a teenager!
INGREDIENTS
2 cups Sugar
1/4 cup Coconut Oil
Red Food Coloring
Peppermint Essentials Oil or you could also use Peppermint extract.
DIRECTIONS
Pour sugar into medium sized bowl.
Mix in coconut oil (add more if you like a wet consistency).
Add a few drops of your Peppermint Essentials Oil.
Divide your sugar mixture into two equal sized portions.
Mix in a few drops of red food coloring to one portion (be careful not to add to much or you will have a bright red).
Add your sugars to the jar in layers. Press your Sugar down with a spoon or I use a can to compact.
Alternate between your pink and white layers
"Jen" over at CincyShopper has provided the recipe and the labels - Just follow the link to print them. http://cincyshopper.com/wp-content/uploads/2013/11/peppermintscrublabels-1.pdf
advertisement
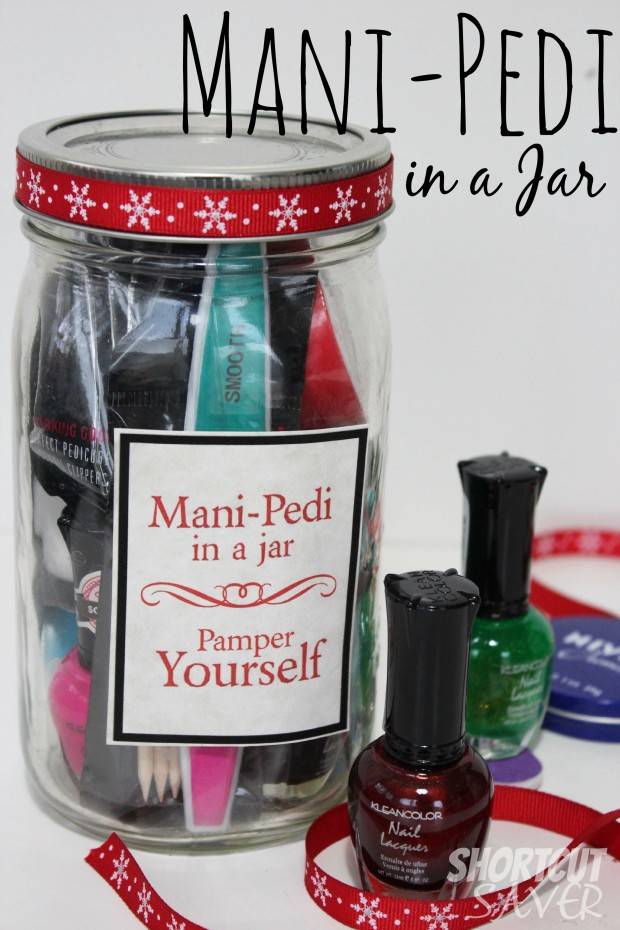
Mani-Pedi
This is a great gift because you can pack a whole lot of gift into one container and has everything one would need to give themselves a manicure or a pedicure and it also doesn't take up a lot of room either! Another great gift idea for a teenager or college student. The $1 stores are also a great place to pick up the items needed for this one. This one is really simple!
Items you will need are:
Large jar
Ribbon and or twine
Labels
And some items to put inside such as; 1 or 2 bottles of nail polish - if you want to add more you can find the real tiny bottles of polish in small bins at places like Wal-Mart, nail file, finger and toenail clippers, small canister or bottle of lotion, nail brush and either a trial size bottle or a small container of nail polish remover pads. If you can fit more you could also get cuticle sticks, a pumice stone and maybe even a package of nail decals. Trial or travel sizes are great for this!
To put it all together you just place all the items in the jar put the lid on and decorate with a nice ribbon or piece of twin and put a label on it. It's that easy!
Alison - a mom of 3 posted this idea over at everydayshortcuts.
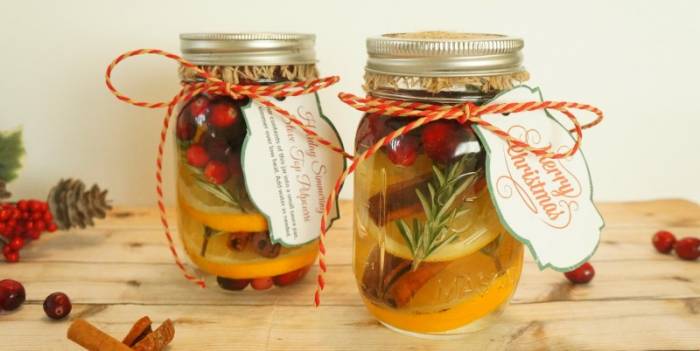
Stove Top Cranberry Orange Potpourri
This one everyone will love!
Materials needed:
1 16 oz. standard sized mason jar with lid
1/2 cup of fresh cranberries
2 springs of fresh rosemary
2 slices of an orange
2-3 cinnamon sticks
a dash of nutmeg
water
burlap
ribbon or twine
gift tag
Make sure your mason jar is clean and dry.
Shake in some nutmeg, about 2 maybe 3 shakes should do it. Then add half of the cranberries.
Then add a slice of orange a sprig of rosemary (about an inch to an inch and a half in length for a regular size jar) and a cinnamon stick. You can get creative and slightly give the slice of orange a little twist when placing it in the jar. Repeat once more adding the remainder of the ingredients making sure that the cranberries are the last to add in.
Take your lid and separate the inside from the outer rim. Cut a piece of burlap to fit between the inside of the lid and the outer rim with a little hangover once placed back together.
SLOWLY fill your jar with water until it reaches the top. Then carefully twist the lid onto the jar. It will be a little tight fitting which might make it a little hard to get the lid on. It might take a couple of tries. Be sure to make sure the lid is on properly and secure.
Next, decorate with your choice of ribbon and or twine. You can design your own gift tag or look for some printable ones on the internet. Print the instructions for use on the back of the tag.
Instructions for use:
Pour the contents of the jar into a sauce pan or small pot. Simmer over low heat and you should smell the aroma of holiday goodness fill the air! The pot should never be dry, add water as necessary. Make these a day or two ahead of time, any longer than that will ruin the contents of the jar.
If you need to make several of these in advance, just omit the water and replace the orange slices with a small orange. You can add in the instructions to slice the orange and add water.
Thanks Deanna over at her Honey & Lime site for this great gift idea!
advertisement
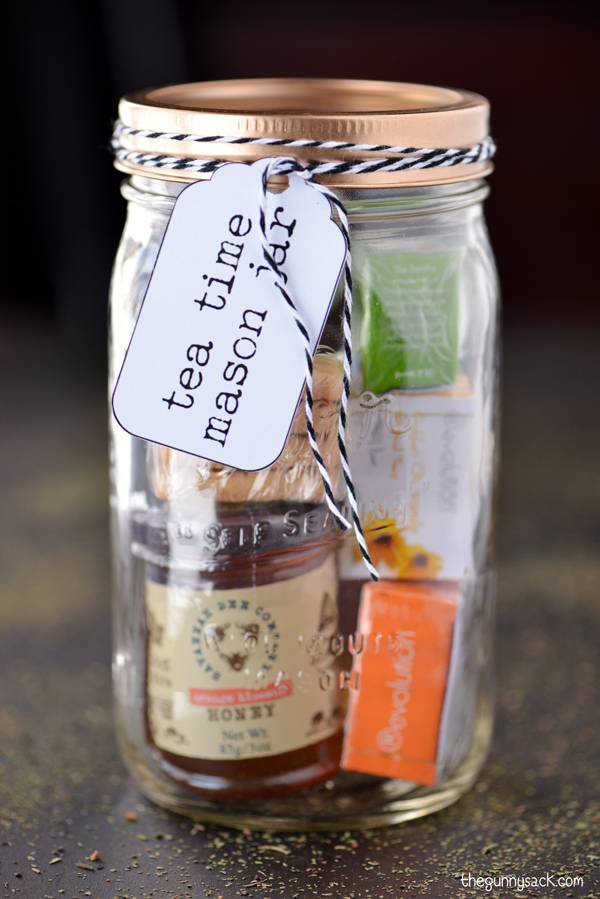
Tea Time
This is a neat little gift idea. Great for a co-worker, mom or even grandma! This one is also extremely easy to make!
You will need:
A medium to large mason jar
Some little sample boxes of tea
Shortbread cookies - you can buy a package and wrap a few yourself or you can make your own and wrap them.
A mini jar of honey.
A tea infuser.
Some Ribbon and or twine - Christmas curling ribbon works well too
You could also add some little "jingle bells" to the ribbon for an even more festive look
Labels - you can make your own or use the ones on this link;
http://www.thegunnysack.com/wp-content/uploads/2014/11/Tea_Time_Mason_Jar_Labels_The_Gunny_Sack1.jpg
Place all the items into the jar, close the lid and decorate!
Thanks Tonia over at The Gunny Sack site for this great gift idea!
advertisement
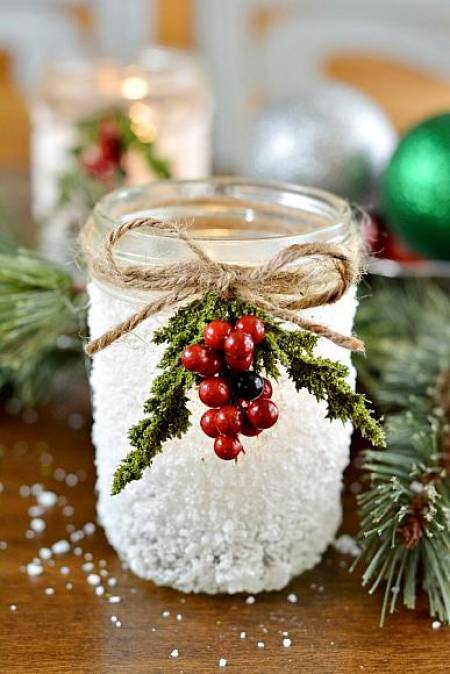
Snowy candle holder
A mason jar gift doesn't always have to have something in it to make a nice gift. Making something out of the mason jar can be just as nice. This would make a nice gift for someone hosting a Christmas party.
Items needed:
Americana Decoupage(Glue-Sealer-Finish) 2oz - Americana Decoupage Matte
Epsom Salt
Mason Jars
Brush - sponge craft brushes work well for applying Decoupage
Twine, Christmas picks
Start by taking a clean, dry mason jar and apply a coat of Decoupage. Pour some Epson salt in a bowl. Next cover the entire jar up to the first rim with Epsom salt by rolling the jar in the salt or pat it on a little at a time with your hand. Once the glue is dry, you can apply a second coat over the salt to help prevent it from falling off. You may also choose to use a spray sealer instead of a second coat.
Once dry and easy to work with, tie some twine around the neck of the jar and use some hot glue to adhere some mixed berries and picks.
Then add either a regular votive or tea-light candle. A flame-less candle will work too.
A pair of these makes a really nice gift.
advertisement
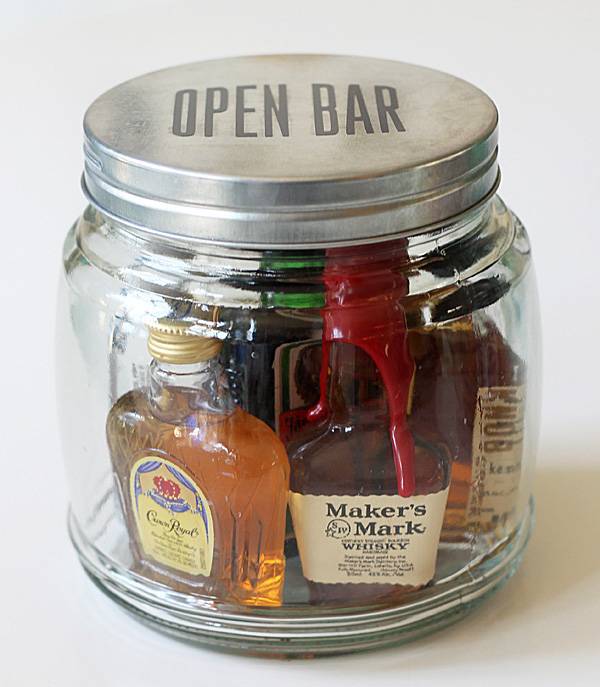
Open Bar
This was originally intended as a groomsman's gift but with a little alteration to the instructions, this would make a really nice gift for any man (providing they drink).
Materials needed:
A large jar with lid (big enough to hold several small bottles)
5-7 small bottles of alcohol
Ribbon and or twine
Labels
Arrange all the bottles of alcohol inside the jar
Place the lid on top
Decorate with ribbon and or twine by tying it around the neck of the jar. You can add embellishments to the outside such as mixed berries and picks (that look like a twig of pine needles)
Create a label and place it on the jar or poke a hole in it and tie it on with the ribbon or twine.
*You can buy label making paper at almost any store like Wal-Mart or craft store.
advertisement
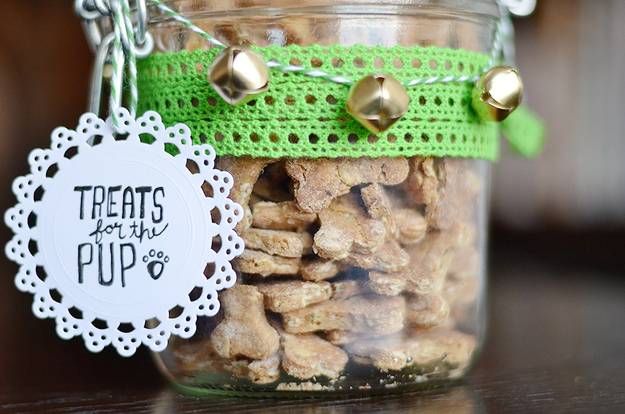
Rover Treats
We can't forget about our furbabies! These doggie treats are much healthier than store bought ones and they are pretty easy to make.
EMBELLISHMENTS NEEDED
Ribbon
Twine
Charms - such as little jingle bells
Labels
INGREDIENTS
2 cups whole wheat flour
1 cup rolled oats
1 tablespoon dried or 2 tablespoons chopped fresh parsley (this helps give doggies fresh breath)
½ cup nonfat dry (powdered) milk
½ teaspoon salt
2 large eggs
1 cup peanut butter
½ cup or more cold water
Makes about 1 quart small biscuits, enough to fill one 34-oz. jar
PREPARATION
1. Preheat the oven to 300°F and lightly grease two baking sheets or line them with parchment paper.
2. Mix together flour, oats, parsley, milk powder, and salt in a medium bowl. Add eggs and peanut butter and stir until the mixture is combined (it will be crumbly). Slowly drizzle water over the dough, stirring as you go. Add just enough water to let the dough come together.
3. Roll the dough out to about ¼" thickness and use a small (about 1.5-inch) dog bone-shaped cutter to cut out biscuits, transferring to the baking sheets as you go. Collect any scraps and re-roll them, repeating until you've used all the dough. Note: If you don't have a dog bone cutter, you can make round dog "cookies" by dropping small (walnut-sized) balls of dough on the baking sheet and flattening to ¼" thick.
4. Bake the biscuits for about 25 to 40 minutes ("cookies" will take longer), or until they're golden brown and dry and crispy all the way through. Let the biscuits cool on the pans and transfer to a jar when they're completely cool. Biscuits will keep for several months in a closed container.
Decorate the jar with ribbon and/or twine and don't forget to set it under the tree!
advertisement
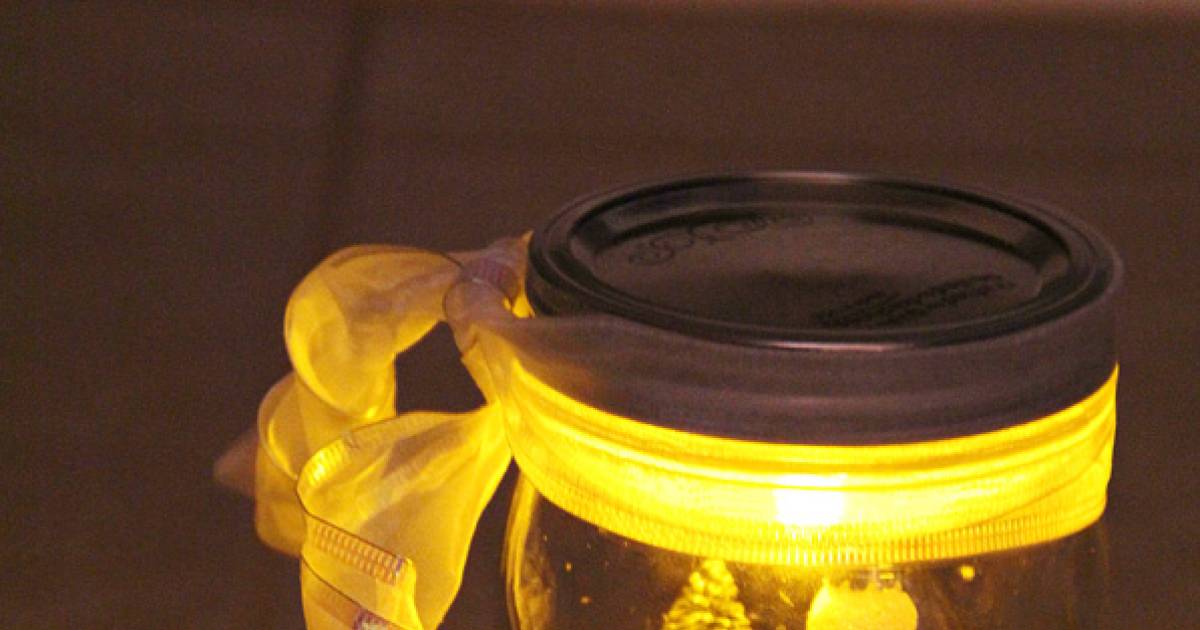
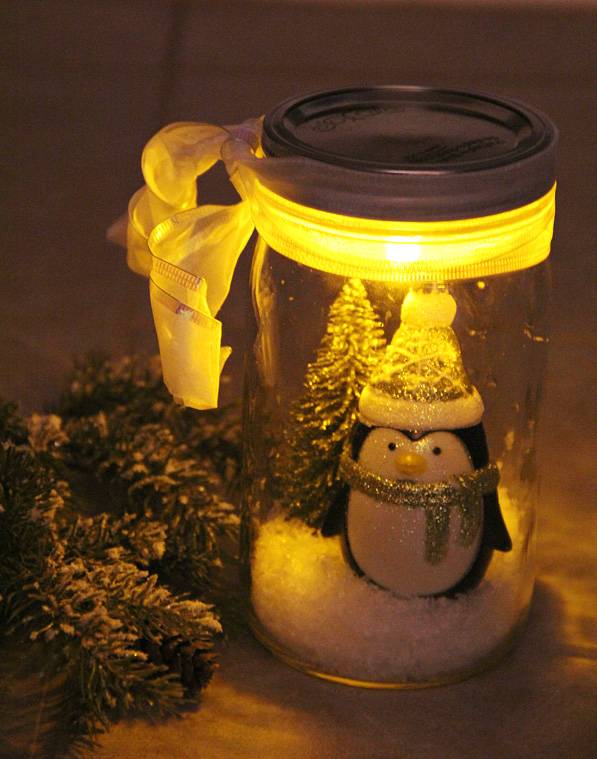
Snow Glow
This is a great one to make because you can just let your imagination run!
To start you will need;
Wide mouth mason jar with lid and cover (Kerr brand is the best because one of the sides of the jar is clear)
Battery-operated tealight
Button magnet
Glue
Faux snow
Ribbon
Whatever you'd like to place in your jar - Most of these items can be found for less than a dollar.
This one has a penguin ornament and a snowy mini tree but you could put anything you want in it! Some ideas; are a log cabin and a bear, figurine on skis with a snowy tree, a mini decorated Christmas tree and some deer figurines....anyway you get the idea.
WHAT TO DO:
Make sure your jar is clean and dry. Pour some faux snow into the jar filling it about an inch to two inches deep depending on how tall your jar is. Arrange your figures in the jar. (If you don't plan on reusing the jar, you might want to put the figurines in first gluing them to the bottom before you add the "snow".
Next take a battery operated tea-light candle and glue a button magnet to the bottom of it, making sure you can still get to the battery. Then place the tea-light candle on to the inside of the lid. Make sure it stays on the lid by giving the lid a little shake. If it doesn't stay, you might need a stronger magnet.
Pick up your tealight and adhere the magnet to the back with glue. Position it so you can still open the back to remove the battery if needed. The button magnet fits perfectly to allow access to the battery.
You can turn the candle on and off by just taking it off of the lid and switching it to the off position and place the lid back on the jar.
Decorate with a colored translucent ribbon (so it picks up some of the lighting giving it a nice glow) You could also place snow flake cut outs either inside the jar (done before anything else goes in) or on the outside using some decoupage to adhere them.
They can be placed just about anywhere. Would give some nice lighting up on a shelf or maybe on the kitchen counter or even a night stand!
What ever you choose to do just have fun with it!
advertisement
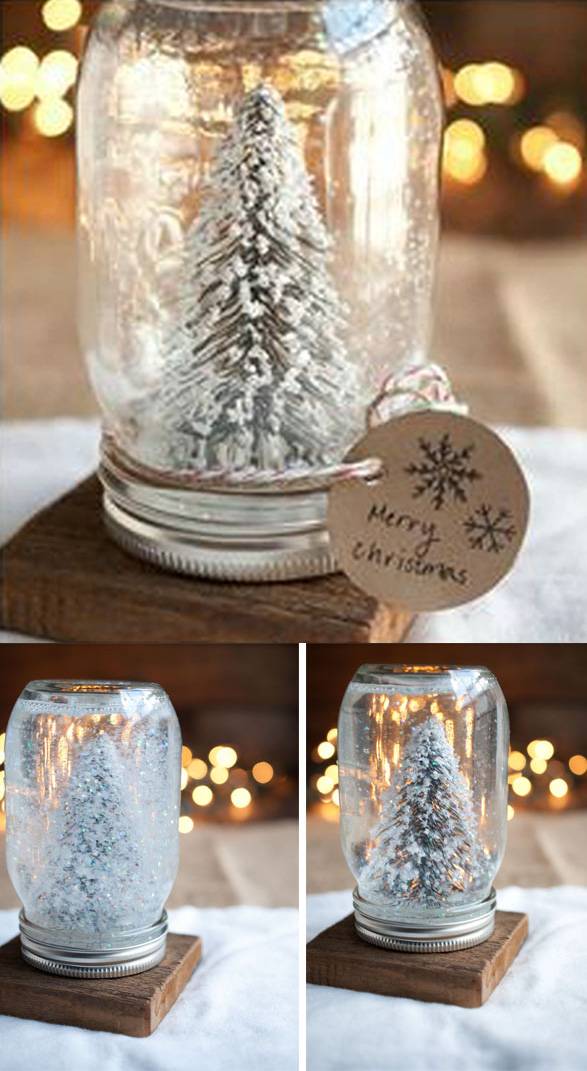
Snow Globe
This is another one where you can use what ever you want inside. But here we are using a tree. Done right these are beautiful and most everyone loves a snow globe!
Items needed:
1 Jar
White craft glitter
Figurine
Gorilla glue
Distilled water
A little bit of glycerin
Twine and or Ribbon
Instructions:
1. Peel off any stickers on the bottom of the tree. Slightly wet the bottom of your tree & the center of the inside of the lid to the mason jar. (Gorilla Glue needs water to adhere)
2. Spread a thin layer of gorilla glue on the bottom of the tree (I used a q-tip) and add a small dot of it to the inside of the lid.
3. Clamp the tree to the lid and let dry for at least 60 minutes. Chip or binder clips work well for clamping.
4. Once dry, add water, glitter, and whatever else you please to the jar. Adding a little bit of glycerin helps the "snow" to fall slowly. Lastly, turn the tree upside down and place inside the jar. **Remember, when you place the tree in the jar it displaces some of the water, so be mindful when adding the water.
5. Press down on the lid (you may glue it if you'd like, but I didn't), then screw on the outer part of the lid tightly.
6. Make a label and lace through some ribbon or twine and tie it to the neck of the jar.
7. Turn the jar upside down, and you now have a snow globe!